I was really excited to try out Android Things on the Raspberry Pi, especaiily with the sweet looking Pimoroni RainbowHAT, but found getting everything up and running initially a bit fiddly. Here are my notes on how it all works. I used a Mac as my developer box but I assume things will be fairly similar if you're using Windows.

1. First of all,
download
the Android Studio and install it. On a mac this just means
dragging the app into the Applications folder.

2. Now run it.
You'll be asked if you want to import anything – you probably
don't. The only other optional
configuration is to select a colour theme. I chose Dracula!

3. Now we'll be able
to connect to our Pi. Boot it from the Android SD card and wait for
the Android Things splash screen to appear. It will show you the IP
address being used by the Pi – make sure you connect it to your
network via an Ethernet cable. Now open up a Terminal (or a CMD
prompt if you're on a Windows box I guess) and cd to the Android SDK
directory just installed. On a Mac that'll be /Users/<your
user>/Library/Android/sdk/platform-tools.
4. Run the adb
command to connect to your Pi, using the IP address shown on the
splash screen.

5.Now head back to
Android Studio. We'll check out one of the sample apps from the
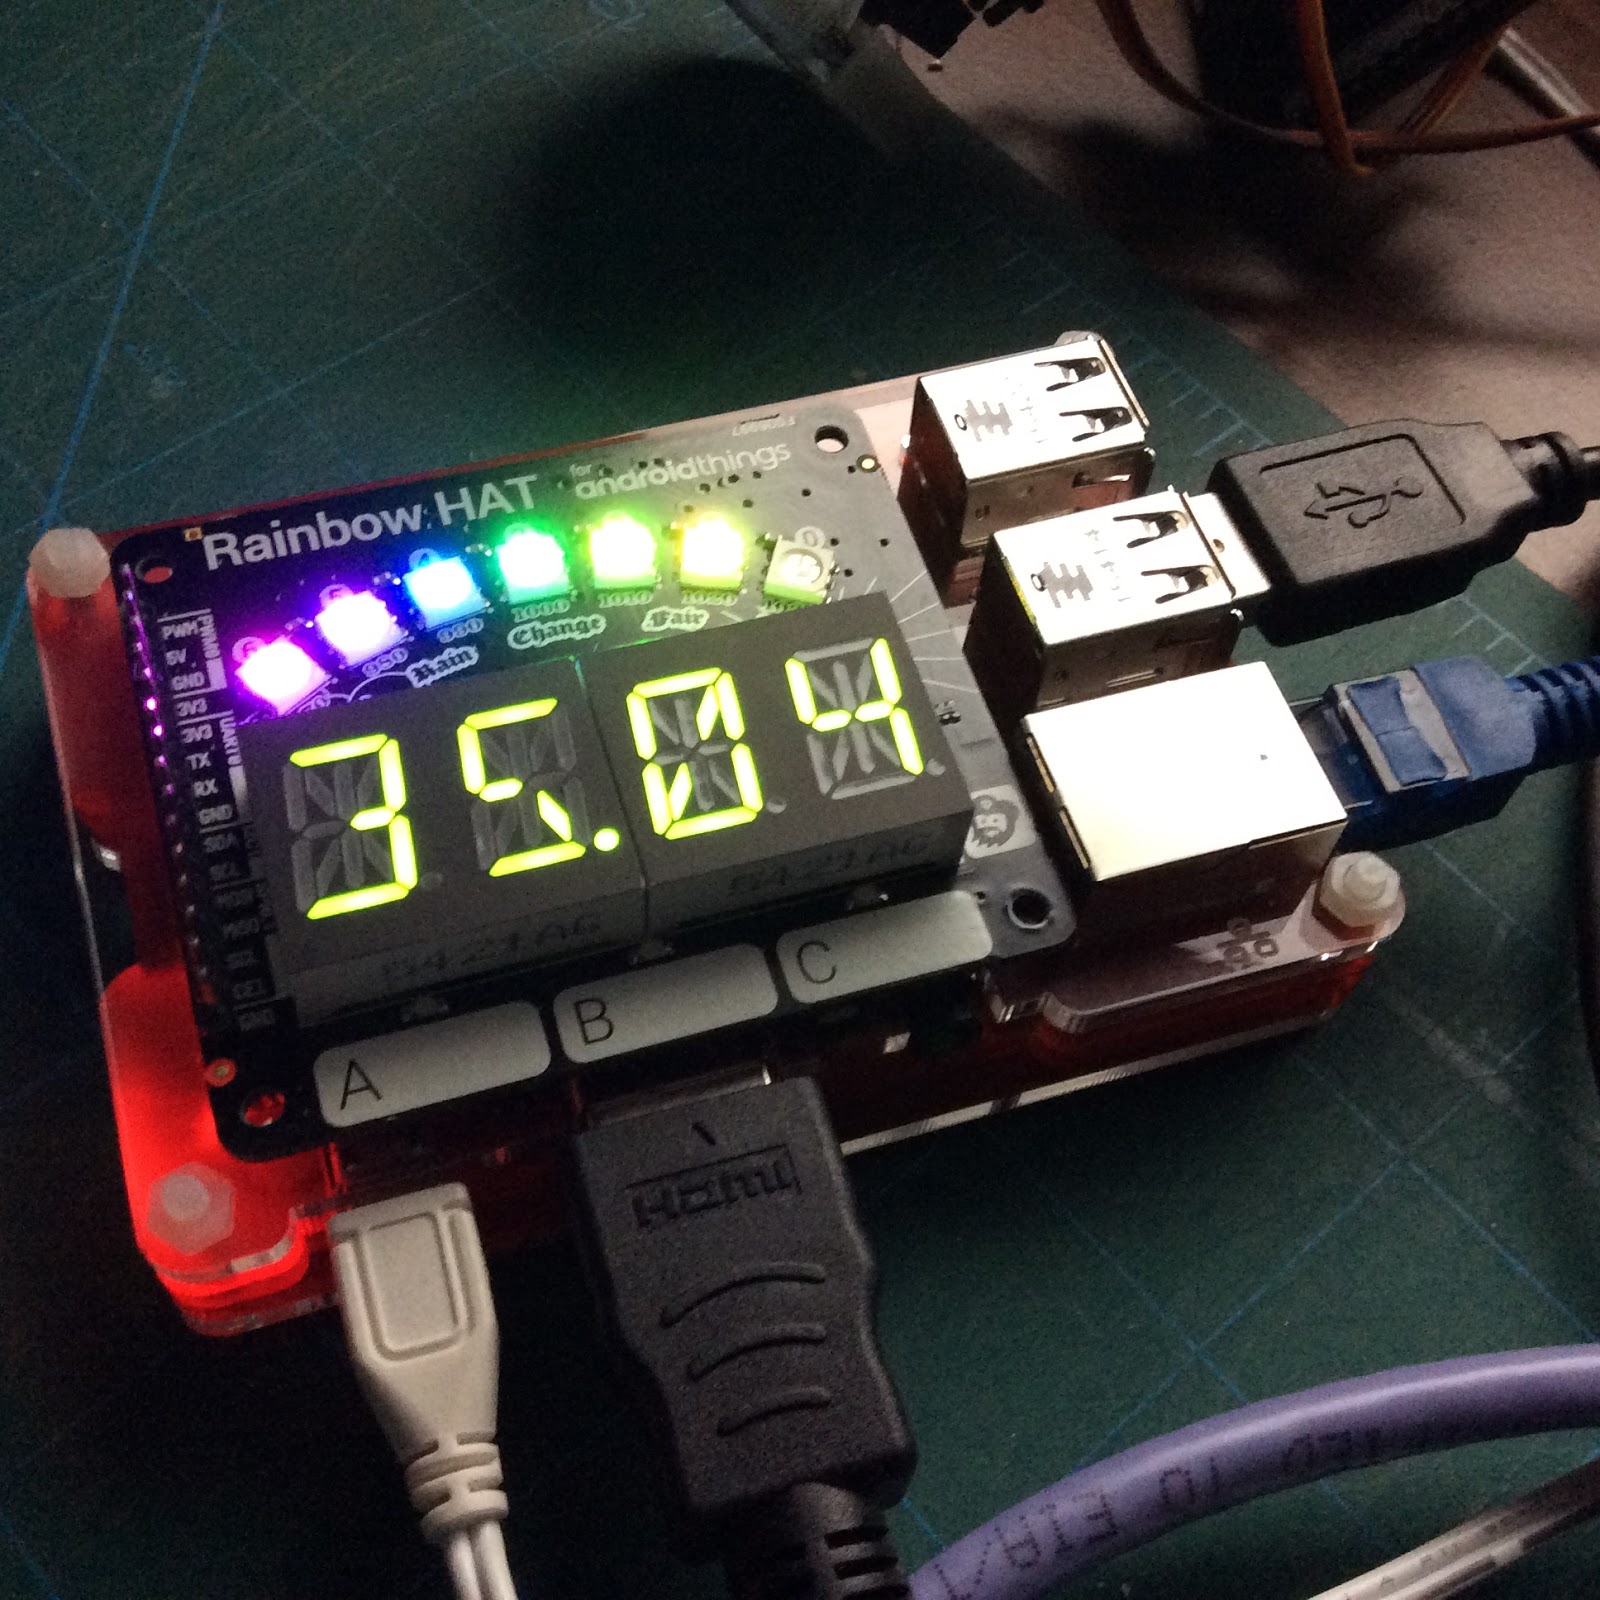
GitHub repo. Let's
start with the simple Button app, which will illuminate one of the
HAT's touch pad LEDs when the pad is pressed.
Click on 'Check out project from version Control' from the Android Studio welcome window and select 'Git'. Copy the URL of the button repo into the appropriate box. Create a folder on your developer machine where you'd like to store your AndroidThings projects and browse to that using the button next to the 'Parent Directory' text box. The sub-directory name should be filled in for you.

6. Then click the 'Clone' button, and once it has downloaded, click 'yes' on the next dialog box.

7. Then Click 'OK' on the next one.

8. Android Studio
will start to build your code, but because you haven't yet downloaded
the correct SDK, you'll get an error. Just click 'OK' – we'll fix
that now.

9. Back at the main
Studio welcome screen (step 2), click on 'Open an existing Android
Studio Project' and browse to the sample-Button folder which has just
been created under the folder created in step 4. Click OK.

10. You'll see a
window like this. If you look closely at the bottom of the window,
you'll see some status messages.

After a few seconds
you'll see a 'Failed to sync' error and a blue 'Install missing
platforms' link. Click on the link.

Accept the license
agreement (after reading it thoroughly, of course) and click next.

13. Then you'll get
another sync error with a link to install missing Platform Tools.
Click the link.

14. You might see a
message about updating plugins. Click 'update'.

15. That should be
everything installed. Now we can run the app. Click on 'Run App' or
the green triangle. You'll be aked to select a deployment target.
You should see an Unknown Iot_rpi3 device listed (if not, try and
reconnect as per step 3). Click OK.

16. The screen on
the Pi should change to be almost entirely white with a black band at
the top with the word 'Button' Try pressing the A touchpad on the Pi
and the LED on that pad should illuminate. Notice that touching
either of the other 2 buttons doesn't do anything (yet).
17. Success ! Your first Android things App. Now let's hack it a bit. We'll keep it simple: let's enable touchpad B instead, but have it turn on the LED on button C. Open the Project view in Android Studio and select the BoardDefaults file from the tree in the left pane.

18. Double click on the file and have a look at the contents. You'll see two functions which we'll need to modify: getGPIOforLED and getGPIOforButton.

19. By consulting
the excellent pinout.xyz
entry for Rainbow HAT we can see that pin 26 is the LED for pad C
and pin 20 is used for pad B itself.

20. Modify
getGPIOforLED so that it returns BCM26 for Pi boards and similarly
modify getGPIOforButton so that it returns BCM20.

21. Now re-run the
app and deploy the new version to your Pi (click the green play
button). You should see the Pi reset. Test the HAT to check that
your changes have had the desired effect.
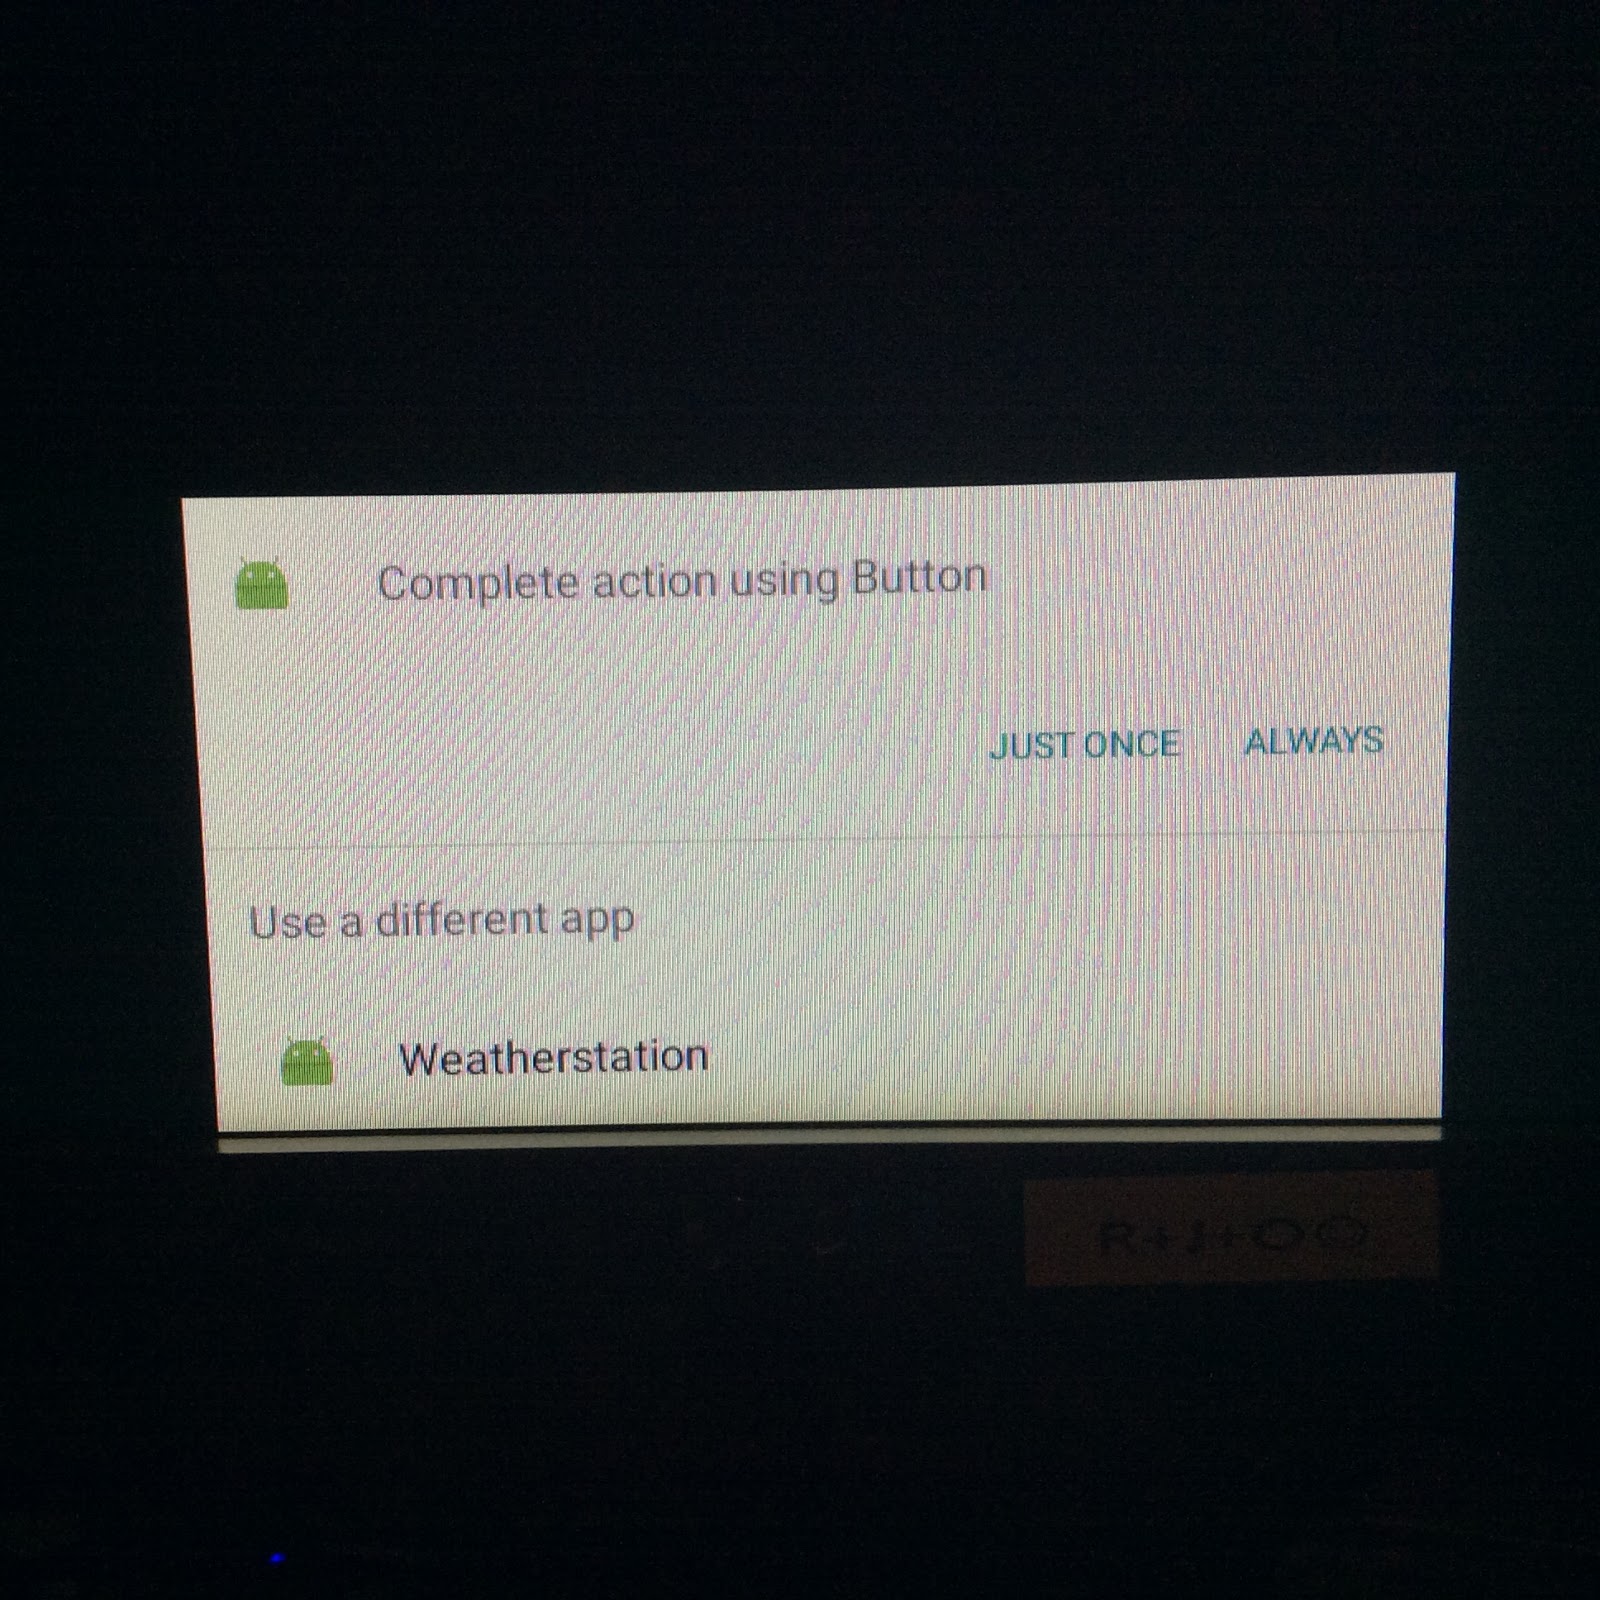
22. Now why not try the awesome weather station app which really lights up the Rainbow HAT. Follow steps 4-17 above but choose the weather station Github repo instead. Once you've deployed it, reboot the Pi. When it restarts you should be given the option as to which app you want to run. Connect a mouse to the Pi and choose the Weatherstation.
23. That's it! Now get stuck into some Java coding and explore some of the other sample code available.
Excellent getting started articel!
ReplyDeleteIf you're really interested in understanding how to compose a very good essay, you need to go through these tips from mastergrades. You will definitely compose a decent essay upon a topic of your interest. An excellent argumentative essay provides the advantages and disadvantages of the problem, and explains why the side of the author is the very best side.
ReplyDelete